
Quite some months ago I had an email from the fabulously talented and soooo sweet Vibeke Harila, her stunning work is well-known all over the world. Vibeke is on the DT of Norwegian challenge site, the Scrappehuset, together with some other very, very talented Norwegian ladies.
Vibeke asked if I would like to visit Scrappehuset with a tutorial on how I create my pages. My gosh, would I?! of course I immediately said YES!! Had myself a serious moment afterwards when it hit me that renowned mega stars have shared their work at Scrappehuset and now I was going to reveal my own ignorance. Scary to say the least!
My page and tut are now posted over at the Scrappehuset, it would really make my day if you would want to have a peek and perhaps even want to leave truly honest comment on how I could have made it better.
Click HERE to come to Scrappehusets blog!
The page I am going to share with you is a little bit different from what is the typical Eila style. My pages often have fussy-cutting and flowers. Well, the flowers sure are there but no fussy cutting this time. I am so hoping you like it. As we say in Swedish - "nu kör vi!"
STEP 1
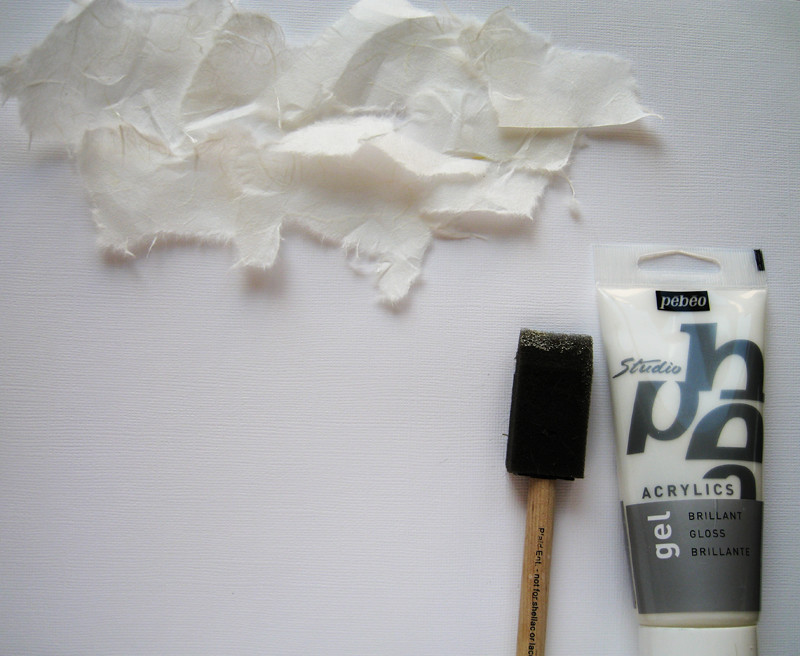
I often use watercolour paper as it is sturdy and doesn't warp like regular cardstock does if you use a lot of mists or mediums. Here I have used handmade paper with structure from India, just ripped it in pieces and lay the pieces on top of each other over the whole page. Pasted everything down with matte gel medium and let dry a bit. I then zapped the page with my heatgun.
STEP 2

In the next step I used another handmade paper with even more structure, this has got grass straws in it. Same procedure with matte gel medium. Dry it.
STEP 3
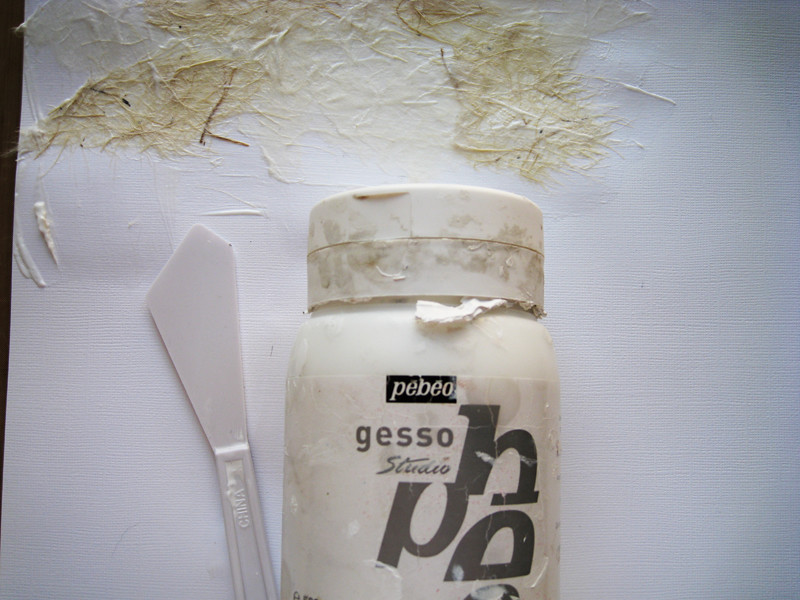
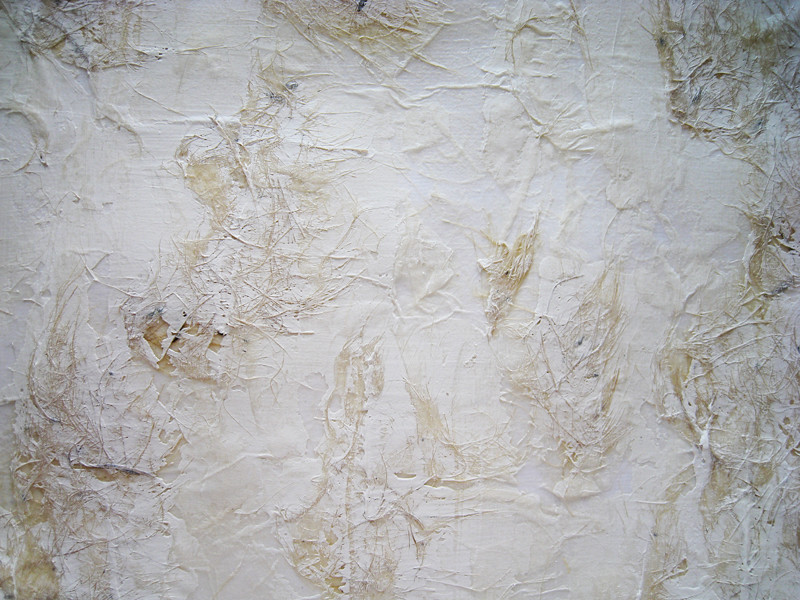
In the next step I used gesso and just smeared it on randomly over the whole page with a spatula. This is how it looked like when finished.
STEP 4
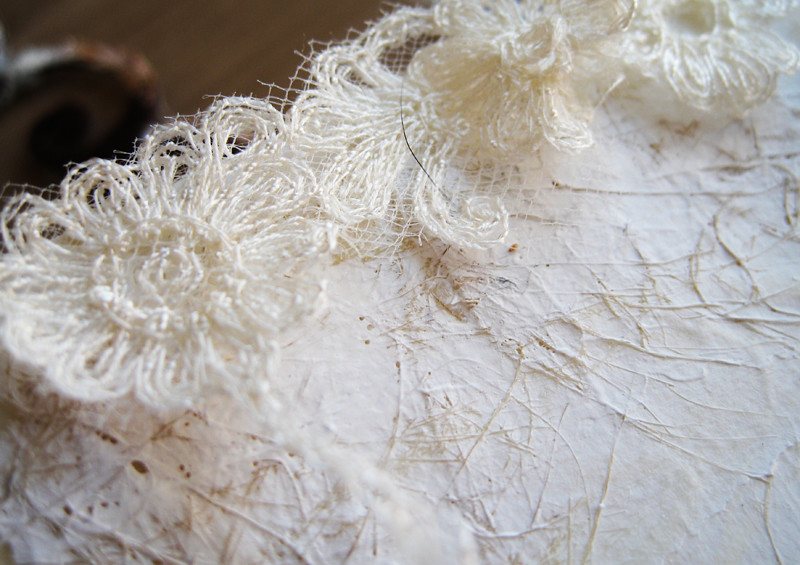
Next I ripped pieces of lace and placed randomly around the border. Pasted it down with matte gel medium too.
STEP 5

Time to bring out the brayer and some cream coloured acrylic paint. I used paint in Linen from local shop Panduro. Spread paint on the brayer and roll out over the centre of the page. Dry with your heatgun.
STEP 6
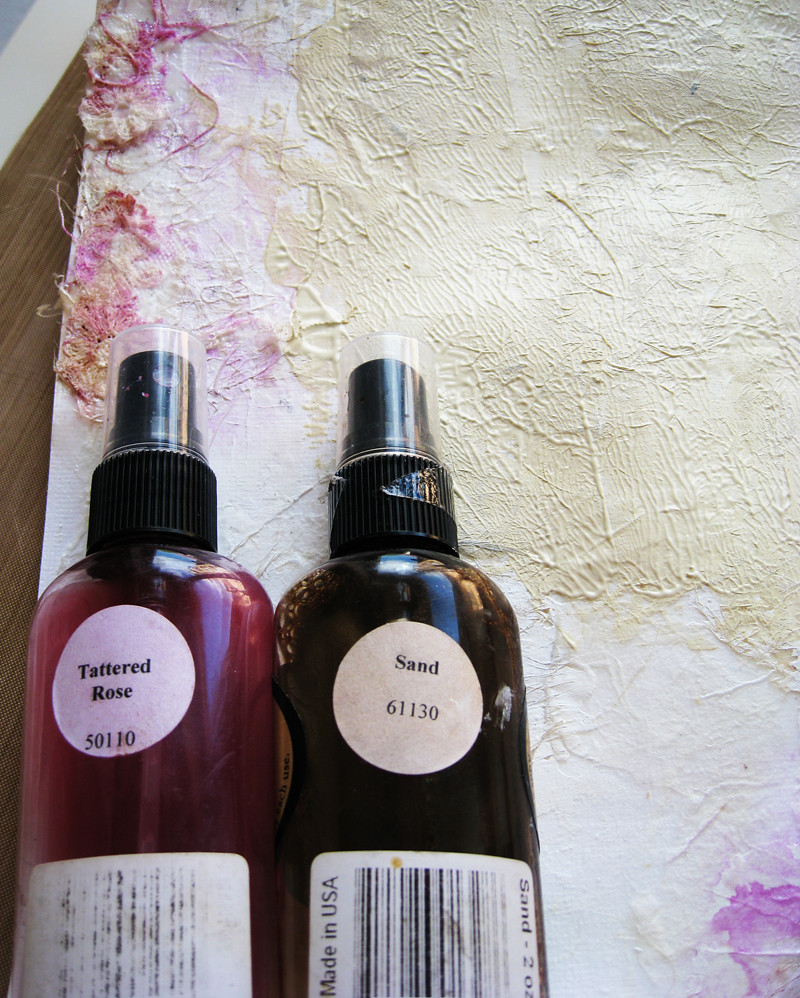
Time to mist the lace, you could do this before brayering on the acrylic paint if you like. I used Tattered Angels glimmermist in Sand and Tattered Rose. Dry with your heatgun.
STEP 7
I photographed the next step after I had painted and chalked the edges in Tattered Angels glimmer mist in Suede (dipped a brush into the bottle and painted sloppily around the edges for a smudged look), then I used chalk in Chestnut Roan to add on to the smudgy look

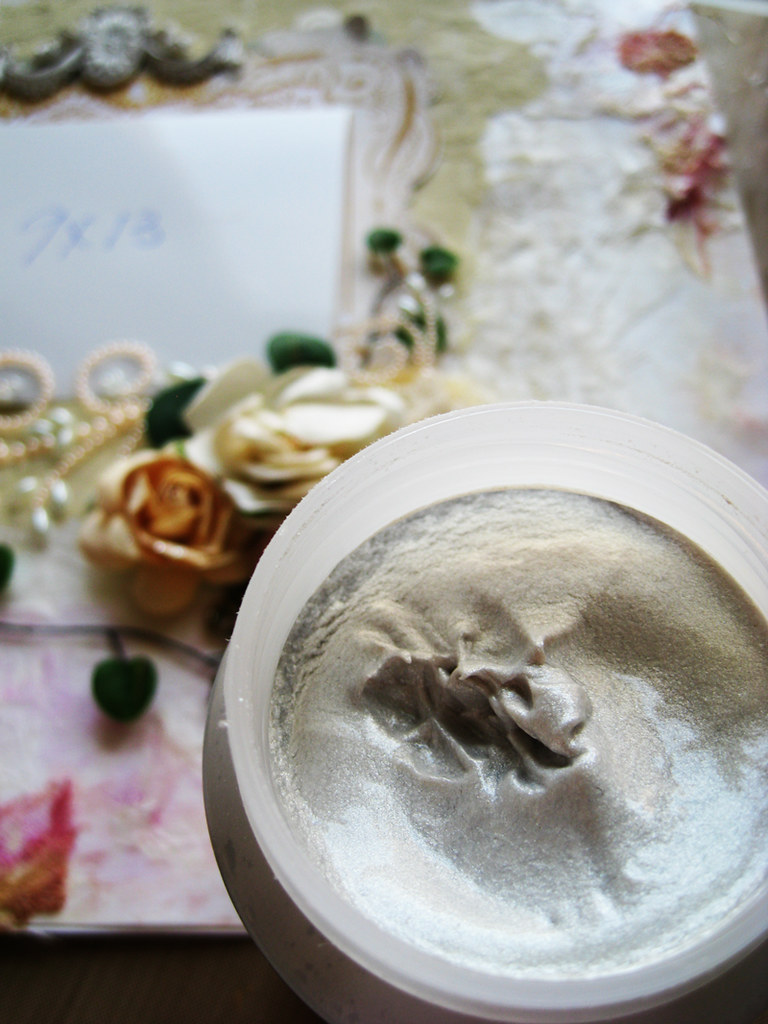
After that I used a mini mask from Crafter's Workshop and modelling paste to create the clover pattern in the corners.
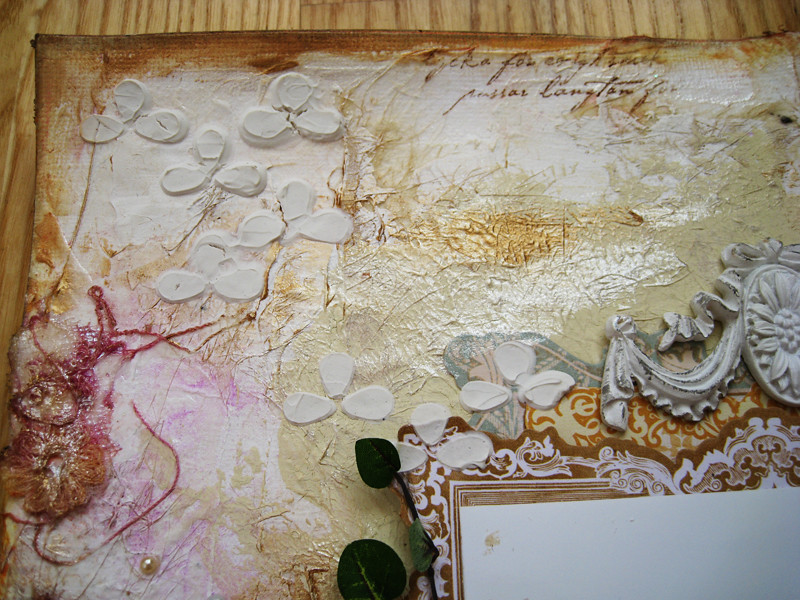
I often add more masking/modelling paste and/or misting/chalking after my page is finished and I can see if it needs some more balance somewhere. You can see in the above photo that I have done exactly that as the masking is made on top of the photo matting.
STEP 8

All of my pages have flowers in them, so that what comes next - the embellishments.
STEP 9
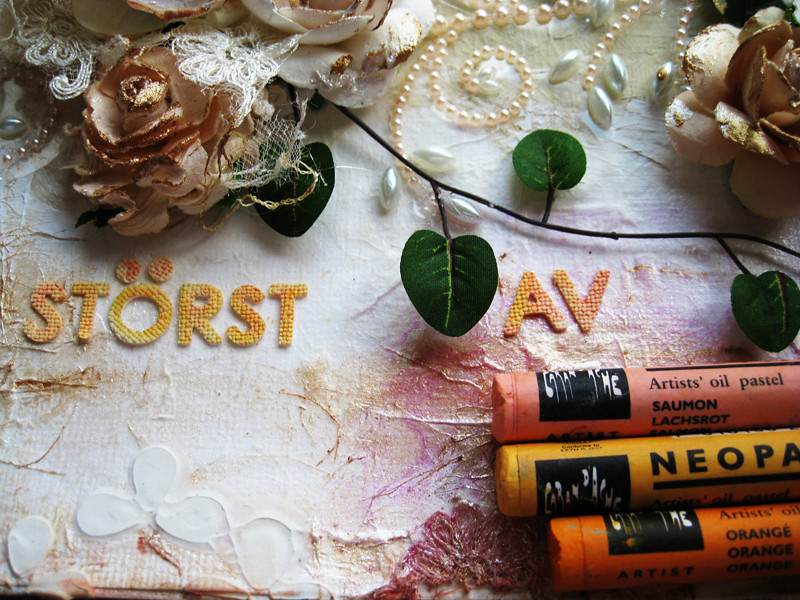
I used cream coloured alphas from Prima. Before sticking them down on the page, I coloured the alphas with Caran d'Ache Neo Colour pastel crayons in salmon pink, sunflower yellow and orange. As often happens, I then thought I would add on some colour to the edges and smudged some more randomly with the crayons.
STEP 10

Those of you who follow me regularly, know that I am in love with gold acrylic paint and use it to highlight and touch up flowers and small details on my pages. Your finger is your best tool!
STEP 11
Winsor & Newton Iridiscent Medium gives a luscious subtle sparkle, I used my finger to smear randomly over the page, the lace, the flowers and the masked pattern. Mind you, use only a very light touch!
THE FINISHED RESULT
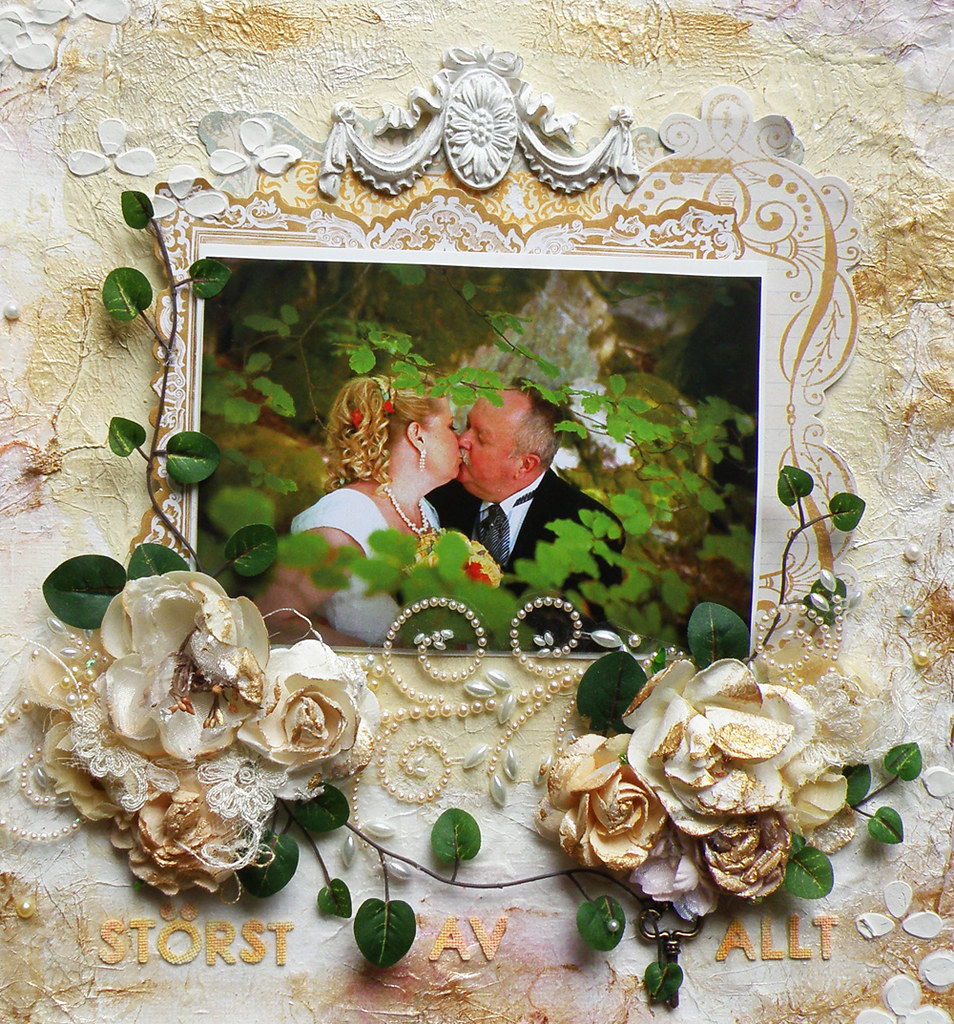
 Here is the finished page! As this was a wedding gift, I left space for the happy couple to put a photo of their own choice in there.
This is what the page looks like with this photo, may I introducte to you Mrs Sylvia Mellander Ekman and her newly wed husband Ulf!
Here is the finished page! As this was a wedding gift, I left space for the happy couple to put a photo of their own choice in there.
This is what the page looks like with this photo, may I introducte to you Mrs Sylvia Mellander Ekman and her newly wed husband Ulf!
 Thank you so so much for bearing with my ramblings again, I truly appreciate your visiting me!
Hubbs and I had a truly wonderful day out yesterday and I have some photos full of Swedish summer glory to share with you in my next post. Till then, have a beautiful weekend wherever you may spending it!
Cheers! xoxo Eila
Thank you so so much for bearing with my ramblings again, I truly appreciate your visiting me!
Hubbs and I had a truly wonderful day out yesterday and I have some photos full of Swedish summer glory to share with you in my next post. Till then, have a beautiful weekend wherever you may spending it!
Cheers! xoxo Eila


Love seeing step by steps and this is fabulous. There is so much detail and work in that background and what a stunning page.
ReplyDeleteCool page &tutorial.
ReplyDeletethankssssss!
Just saw ur post at Scrappehuset and headed here - I love the way they said that you were the nicest scrapper one can think of :) Love, love, love the BAP tut!
ReplyDeleteOh my...how gorgeous is this!Wow!! Thanks for the awesome tutorial!
ReplyDeleteOh thank you for sharing the creation of this amazing layout.. all the work in the back ground is stunning and the end result is exquisite!
ReplyDeleteEila, what a stunning layout. Thank you for sharing how you created it. You always create such amazing backgrounds. You are such an inspiration x
ReplyDeleteThis is amazing Eila! I am in awe of your creative process. So beautiful and full of wonderful details and ideas! Thank you so much for sharing!
ReplyDeleteI'm speechless - so so so amazing! TFS!
ReplyDeleteWOW!!! Amazing and Beautiful. You are truly a very talented person. Thank you so much for sharing the process with us lesser mortals :-)
ReplyDeleteHar precis varit oc tittat på din fantastiske tutorial Eila. Du borde verkligen överväga att ha kurser för du är superbra på detta!! :o)
ReplyDeleteVillken underbar gåva till sötaste Sylvia och hennes Ulf. Det var så roligt att se hur du bygger upp dina underbara bakgrunder och jag är mycket imponerad av alla tekniker du har plockat upp under din scrap-resas gång. Hatten av för dig min sköna!!
What a fab tutorial, love the design on this page. Thanks for all your great ideas about using different glues and paints. This is something I would like to try. Ha en fin sommer :)
ReplyDeleteTotally love this Eila...Thanks so much for sharing! Will definitely be giving some of your techniques a go :)
ReplyDeleteThankyou so much for sharing this Eila!! So wonderful to see how you work. All that texture is just fabulous. I always love to see what different mediums everyone uses too. CONGRATS on your GD. You totally deserve it. It's a beautiful layout. CONGRATS to Sylvia and Ulf too!! :-) xoxo
ReplyDeleteThat is so great Eila !! Very clear, very easy to understand, great techniques and beautiful results. You are so clever. Congratulations and thanks for sharing. xx
ReplyDeletethanks for sharing Eila, great Tutorial, fabulous page lots a beautiful details :) have a great day :)
ReplyDeleteA wonderful insight into your creative process. Thank you so much for sharing this!
ReplyDeleteThis is beautiful page, great color combo too!
ReplyDeleteAmazing page Eila! Congrats on the GDT!! You really rose up to the plate on this one!! Great tutorial and you know what? We have a very similar process!! I work in the same order as you and agree fingers are best, etc!! AND somewhere I have a small pile of papers made out of ELEPHANT DUNG!!! If I come across them before Christmas I will send you some as a gift LOL!!! FULL of texture as you can imagine but thankfully well cured and NO! they don't smell :)
ReplyDelete